Add existing project to BitBucket using Xcode
Solution 1
Since a lot of folks land here when they google "Add existing project to BitBucket using Xcode" and then click through to the link that goes to my blog post on the subject, I thought I would put the information here (in the spirit of SO which discourages link only answers.)
NOTE: These instructions assume you have already made a local git repository for the project. You may have done this at project creation. If not, you will need to create the local git now. See this StackOverflow post for how to do that: https://stackoverflow.com/questions/19495141/add-local-repo-for-existing-xcode-5-project
For Xcode 9 and the new Beta UI for Bitbucket:
- Log into your BitBucket Account on their web site.
- Click the Create button (plus sign + in the newest version of the web UI). And click Repository.
- Give your new repository a name. Additional features for the repo can be configured under the Advanced menu. Make sure the check mark for Private is on if you desire that. Verify that the repository type is Git. If desired, add issue tracking, and a Wiki. Select Objective C or Swift from the language drop down. Then Create Repository.
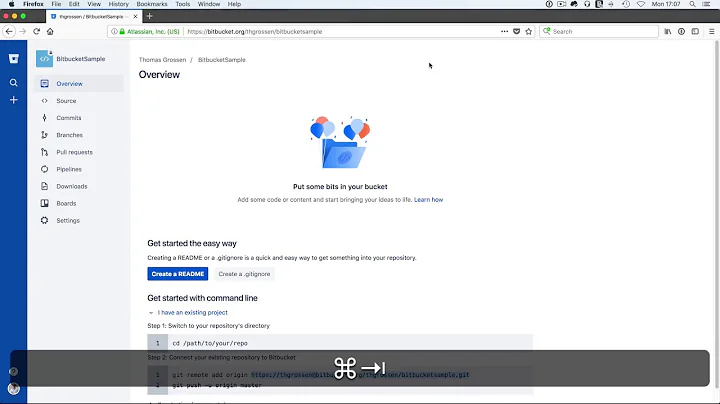
- Next, you will want to add your code. On the top of the Overview page is a field with the HTTPS URL of your project. It will look something like this: https://[email protected]/xyzteam/xyzapp.git. Highlight and copy that URL text.
- Run Xcode and load your project.
- From the left pane in Xcode, select the Source Control Navigator. Expand the project node. Right click the Remotes node under your project. Select “Add Existing Remote…”
- Give it a remote name, such as Bitbucket. Paste the URL from step 4 into the Location. Click Add. It should now appear as a Remote location in the Source Control navigator.
- Once your remote has been added, you should now be able to push to the remote. Select Source Control/Push… It should show your Bitbucket remote as the destination and will show (Create) as this is the first push. Click Push.
- If this is the first time you are pushing this project to BitBucket, you will be asked for login credentials. The User Name will be prefilled from the URL, so enter the password. Click Okay and after some seconds, it should complete.
If all goes well, you now have the repositories linked up. Go to the BitBucket site, select your repo and you should see the code.
For Xcode older than version 9 and the old Bitbucket UI:
Log into your BitBucket Account on their web site.
Click the Create button.
Give your new repository a name, a description, and make sure the check mark for Private is on if you desire that. Verify that the repository type is Git. If desired, add issue tracking, and a Wiki. Select Objective C or Swift from the language drop down. Then Create it.
Next, you will want to add your code. I am assuming you have an existing project. On the page, you will select “I have an existing project” link from the Command line section.
You will see instructions for linking your local git repository to the remote. There is no need to follow those instructions. However, you will see an https url listed. It will look something like this: https://[email protected]/xyzteam/xyzapp.git. Highlight and copy that URL text.
Run Xcode and load your project.
From the main menu, select Source Control. Under the gray “Working Copy” item, you will see a menu with your local git repo name and the currently active branch. Expand this menu and you will see an option to Configure [Your project]…. Select this.
Select the Remotes pane from this screen. At the bottom, click the plus +. Select Add Remote…
Now you need a name and a URL. For the name, typically just use your project name, then paste the URL copied earlier in step 5. Some people have found that they must remove the user name portion of the URL. Per the example, remove “johndoe@”. This may have to do with whether your project is set up as a team project, or an individual project.
Click Add Remote. Click Done.
Once your remote has been added, you should now be able to push to the remote. Select Source Control/Push…. If this is the first time you are pushing this project to BitBucket, you may be asked about keychain access and/or login credentials. Enter the appropriate responses, such as Allow for keychain. If you have already done this before, it will simply use the keychain data without further prompting.
If all goes well, you now have the repositories linked up. Go to the BitBucket site, select your repo and you should see the code.
If you want to see a version of this information with screen shots, see my blog post.
Solution 2
Login your bit bucket account and Create a repository in your account
open terminal run these following command
1- cd /path/to/your/repo
2- git remote add origin <url of your repository >
3- git push -f origin master
it works for me, Thanks.
Related videos on Youtube
 03 : 06
 05 : 05
 05 : 06
 05 : 24
 01 : 35
Mark
Updated on July 09, 2022Comments
-
Mark almost 2 years
I keep getting an error when I try to commit my project files using Xcode.
File -> Source Control -> Commit
"The operation could not be performed because no valid working copies were found." "Please verify that your files are under source control and try again."
This is an existing project that is NOT under source control. How do I get my project files under source control, using Xcode?
EDIT: Answered my own question.
Step 1) Restart Xcode
Step 2) Choose connect to repo
Step 3) Enter repo address
Step 4) Choose existing project folder you wish to place under version control
Step 5) Voila! :)
-
Matthias Bauch almost 11 yearsNo, you edited your question. Put the answer into a real answer and delete it from your question. We want people to answer their own questions, but please do so in a real answer, not in a edit. People won't notice that your question is already answered if you just edit the question.
-
-
syko almost 8 yearsGood answer, I appreciate it
-
aaronsti over 7 yearsI got the error: "The name “%@” is not a valid remote repository name" in step 9. I fixed this by removing spaces in my project name.
-
Shyam over 6 yearsThis is a very detailed post, which has helped me. But, can this be updated for Xcode 9, please? @David Lari
-
Shyam over 6 years@DavidLari , thanks! I get authentication issues, although my password is correct.
-
David Lari over 6 years@Shyam, I have updated but I'm not sure it will address the issues you are having.
-
Shyam over 6 years@DavidLari, you were right! I still get the same issues. Guess, I should log this with Apple! Thanks for your time, though. :)
-
Amber K almost 6 yearsCan anyone guide steps with source tree instead of xcode?