How can I install Apache with a specific version?
Solution 1
You need to do the following:
apt-cache showpkg <pachagename>
The above command will display list of available versions for this package. Then select the needed version and do the following.
apt-get install <packagename>=<complete version name>
Example:
apt-cache showpkg apache2
apt-get install apache2=2.2.14-5ubuntu8.7
Solution 2
How to install Apache 2.2 on an Ubuntu distro that does not have it in the repositories.
Requirements
You need to have the build-essentials package installed to do this.
~# sudo apt-get install build-essential
To give Apache the ability to compress output to browsers that support it, you need to install zlib. Download the current release from the zlip Hompage (zlib-1.2.11.tar.gz as of writing), extract it, navigate to the extracted folder, build, and install.
wget http://www.zlib.net/zlib-1.2.11.tar.gz
tar -xvf zlib-1.2.11.tar.gz
cd zlib-1.2.11/
./configure --prefix=/usr/local
make
sudo make install
Install Apache 2.2
Download the curent version from the Apache Download Page (httpd-2.2.32.tar.gz as of writing), extract it, navigate to the extracted folder, build, and install.
wget http://www-eu.apache.org/dist/httpd/httpd-2.2.32.tar.gz
tar -xvf httpd-2.2.32.tar.gz
cd httpd-2.2.32/
./configure --prefix=/usr/local/apache2 --enable-mods-shared=all --enable-deflate --enable-proxy --enable-proxy-balancer --enable-proxy-http
make
sudo make install
Start Apache:
sudo /usr/local/apache2/bin/apachectl start
Check, if everything is OK
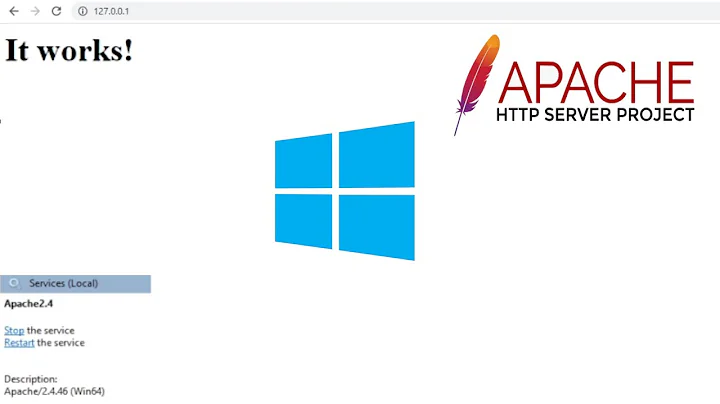
Navigate to http://localhost in your browser, where you should see a message saying “It works!”.
Alterntively, you can do this via terminal:
wget -qO- http://localhost | grep "It works!"
Which should output something like this in the terminal:
<html><body><h1>It works!</h1></body></html>
Create "service" for Apache2
sudo cp /usr/local/apache2/bin/apachectl /etc/init.d/apache22
sudo chmod +x /etc/init.d/apache22
Hint: you can call apachectl with sudo service apache22 now.
Make Apache start at boot time
sudo sed -i '2i #\n### BEGIN INIT INFO\n# Provides:             apache2\n# Required-Start:       $remote_fs\n# Required-Stop:        $remote_fs\n# Default-Start:        2 3 4 5\n# Default-Stop:         0 1 6\n# Description:          apache2\n# Short-Description:    The Apache webserver\n### END INIT INFO' /etc/init.d/apache22
sudo /usr/sbin/update-rc.d apache22 defaults
Secure Apache
sudo service apache22 stop
sudo adduser --system apache
sed -i -e 's/User daemon/User apache/g' /usr/local/apache2/conf/httpd.conf
sed -i -e 's/Group daemon/Group nogroup/g' /usr/local/apache2/conf/httpd.conf
sudo service apache22 start
Check new settings
ps -aux | grep httpd
If the terminal output of the last command shows some lines starting with "apache" then everything is OK.
Configure your site(s)
If you want to configure your apache for just one site, simply edit the httpd.conf
nano /usr/local/apache2/conf/httpd.conf
The essential parameters you may want to modify are:
ServerName www.example.com:80
DocumentRoot "/usr/local/apache2/htdocs"

<Directory "/usr/local/apache2/htdocs">
    Options Indexes FollowSymLinks
    AllowOverride None
    Order allow,deny
    Allow from all
</Directory>
If you want to configure more than one site, have a look at httpd-vhosts.conf
nano /usr/local/apache2/conf/httpd.conf
You will have to add a < Directory > section withing the < VirtualHost > similar to the one above, but for the document root of the VitualHost. For example:
<VirtualHost *:80>
    ServerAdmin [email protected]
    DocumentRoot "/usr/local/apache2/docs/dummy-host.example.com"
    ServerName dummy-host.example.com
    ServerAlias www.dummy-host.example.com
    ErrorLog "logs/dummy-host.example.com-error_log"
    CustomLog "logs/dummy-host.example.com-access_log" common
    <Directory "/usr/local/apache2/docs/dummy-host.example.com">
        Options Indexes FollowSymLinks
        AllowOverride None
        Order allow,deny
        Allow from all
    </Directory>
</VirtualHost>
Solution 3
See the ubuntu howto on package pinning:
Edit file /etc/apt/preferences
The 'preferences' file is where the actual pinning takes place. To pin a package, set its Pin-Priority to higher number. Here's an example:
Package: apache2
Pin: release n=raring
Pin-Priority: 1000
Test before running apt-get update or apt-get install with apt-cache policy apache2
See man apt_preferences for details. I chose pinning raring's release because this way you'll still get updates on the 2.2.x branch. Don't forget that you have to make the package available to APT by adding raring's repository URLs.
Update:
As raring is EOL, you could either use the still supported precise or the archived raring packages from http://old-releases.ubuntu.com.
Using this as /etc/apt/sources.list.d/raring.list will allow you to install older packages:
deb http://old-releases.ubuntu.com/ubuntu/ raring main restricted universe multiverse
deb-src http://old-releases.ubuntu.com/ubuntu/ raring main restricted universe multiverse
deb http://old-releases.ubuntu.com/ubuntu/ raring-updates main restricted universe multiverse
deb-src http://old-releases.ubuntu.com/ubuntu/ raring-updates main restricted universe multiverse
deb http://old-releases.ubuntu.com/ubuntu/ raring-backports main restricted universe multiverse
deb-src http://old-releases.ubuntu.com/ubuntu/ raring-backports main restricted universe multiverse
deb http://old-releases.ubuntu.com/ubuntu/ raring-proposed main restricted universe multiverse
deb-src http://old-releases.ubuntu.com/ubuntu/ raring-proposed main restricted universe multiverse
Solution 4
To install apache2.2 use the following process:
On a later distro (e.g. 16.04), I downloaded the 2.2.31 from the Apache site.
I built it using the following configuration:
./configure --enable-so --enable-ssl --with-included-apr --enable-mods-shared=all --enable-load-all-modules --enable-rewrite --enable-proxy --enable-proxy_connect --enable-proxy_http --enable-proxy_ajp --enable-authn_alias --with-npm=prefork --enable-proxy_balancer --enable-proxy_ftp --enable-cache --enable-suexec --enable-disk_cache > conf.txt
Then of course tweaking the httpd.conf and ssl.conf files.
After that I just run the ./httpd -k start
And it works !
note that I added the apache2.4 via apt-get but never removed it. This means that after system start, I need to kill the apache2 process. And then I am able to start apache2.2. I had to install apache2.4 to use apachectl but later disbanded that because I use ./httpd
Solution 5
You upgraded from Ubuntu 13.04 to 13.10? There is no way to get Apache 2.2 back without going outside the Ubuntu package repositories. It's better to just fix your Apache configuration so that it works with 2.4.
Related videos on Youtube
 05 : 22
 10 : 22
 06 : 33
 10 : 58
 07 : 10
Mithril
Updated on September 18, 2022Comments
-
Mithril over 1 year
Because of Ubuntu updating, I made the mistake to upgrade Apache 2.2 to 2.4—many things went wrong.
I have no idea how to specify the version after
apt-get remove apache2.apt-get install apache2always installs 2.4.How can I do it?
-
Ravish Bhagdev about 9 yearsHi. This seems to be exactly what I want. Can you please also add commands for adding raring's repository URLs? I cannot seem to find the right ones.
-
fuero about 9 yearsI've updated my answer.
-
fuero about 9 yearsNice catch, I've corrected the APT mirrorlist to
raring. Of course if you want to use thepreciseversion,/etc/apt/preferencesmust be changed accordingly too. -
Ravish Bhagdev about 9 yearsThanks a lot. Anyway turning out to be a can of worms... will have to take the VM route as getting following after performing specified steps (and also trying install -f option and clean) The following packages have unmet dependencies. apache2 : Depends: apache2-mpm-worker (= 2.2.22-1ubuntu1.7) but it is not going to be installed or apache2-mpm-prefork (= 2.2.22-1ubuntu1.7) but it is not going to be installed or .... etc etc
-
 felwithe over 7 yearsThe only version that shows for me is 2.4 on Ubuntu 16. This is a big problem because 2.4 has known issues that have completely broken my site.
 -
 Johano Fierra almost 7 years@CoenDamen actually you answer is "going outside the Ubuntu package repositories". Also, your answer won't work "as is" for any fresh Ubuntu installation, as it will be missing quite a few dependencies.
 -
Johano Fierra almost 7 yearsHave a look at my answer regarding using apachectl for Apache 2.2, you may have to remove the 2.4 version first though (/usr/sbin/update-rc.d -f apachectl remove).
-
Braian Mellor almost 7 yearsVersion 2.2.14-5ubuntu8.7 for apache2 was not found
-
Dženan over 6 yearsFollowing these instructions, I run into this: dzenan@ubuntu16-i386:~/httpd-2.2.34$ sudo /usr/sbin/update-rc.d apachectl defaults insserv: script apachectl: service apache2 already provided! insserv: exiting now! update-rc.d: error: insserv rejected the script header
-
Dženan over 6 yearsIndeed, on Ubuntu 16.04 there is already
/etc/init.d/apache2file with radically different content. -
Dženan over 6 yearsRemoving the offending file gets us over that step, but
sudo service apachectl stopdoes not stop the service. -
Johano Fierra over 6 years"sudo service apachectl stop" would only not work, if you didn't follow the steps under Make Apache start at boot time. Having read though my answer, I decided to change it... first, apachectl is really a bad name for a "service" and it was bad to make creating it part of that section. So, instead you would now do sudo service apache22 start/stop, AFTER following the steps under Create "service" for Apache2.
-
Dženan over 6 yearsI decided to abandon this approach and update my config file to be compatible with apache 2.4. Less headaches that way. But thanks for the detailed answer!
-
 MitchellK almost 6 yearsThank you, this is certainly the correct way to do it. Thanks to you I am now compiling with your method inside my TravisCI build environment for testing purposes of my Bot Blocker and it's working like a charm.
 -
 M Thomas over 5 yearsThanks - this worked better than trying to go the PPA route.