How to change password for Gentoo LiveCD in 2015?
Solution 1
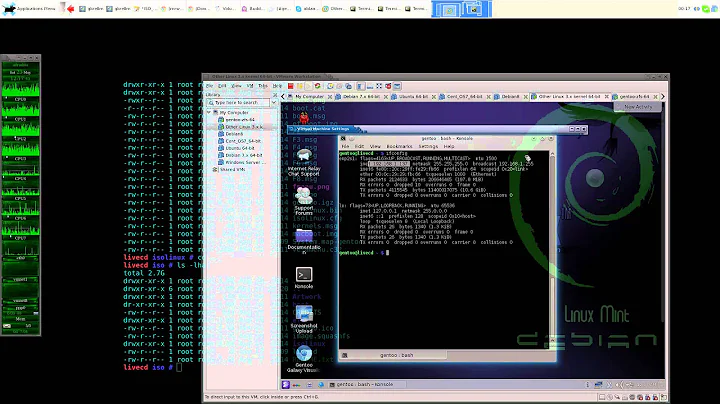
Opening a regular terminal and typing:
$ sudo passwd
should take care of it. Gentoo live CDs don't have passwords, so it shouldn't prompt you for one when invoking sudo commands.
You must do this before attempting tasks that require root privileges.
Solution 2
On the 2016 LiveCD, root login is disabled by default.
Nano /etc/ssh/sshd_config
Find the line that begins "PermitRootLogin". Uncomment the line and set to Yes. Commented lines used to denote default values, I presume that is still the case.
PermitRootLogin yes
Save and exit, then restart SSH.
Related videos on Youtube
 46 : 51
 10 : 10
 03 : 44
 34 : 42
 02 : 16
jww
Updated on September 18, 2022Comments
-
 jww over 1 year
I have a LiveCD from Gentoo. Gentoo still does not offer an installation option, so I planned on working from the ISO image and saving VM state after configuring the VM.
To configure the VM, I need to install software, and that requires root privileges. For root privileges, I need to know the root password, which Gentoo fails to provide. In fact, I don't even have the gentoo user password, so I can't SSH into the box or change the gentoo user's password.
Searching for how to change the password is pulling answers from 2005 to 2011 (yep, these problems have existed for over a decade...). Suggestions like "open a root terminal and issue
passwd" don't work because there is no root terminal (or I can't find it by searching in the tablet interface for desktops). And suggestions like performing a Chroot don't work because there does not appear to be one setup (chroot <TAB>does not offer any suitable suggestions).How, exactly, do I change the root password for Gentoo's LiveCD?
More backstory is I am not a Gentoo user. I need to test one piece of software under it because one of our users prefers the platform. After testing, I am done with it for another 3 or 6 months. Hence the reason I want to make my changes to the LiveCD image in memory, and then save the VM without jumping through all the hoops to perform an actual install.