How to create this curves in flutter?
Solution 1
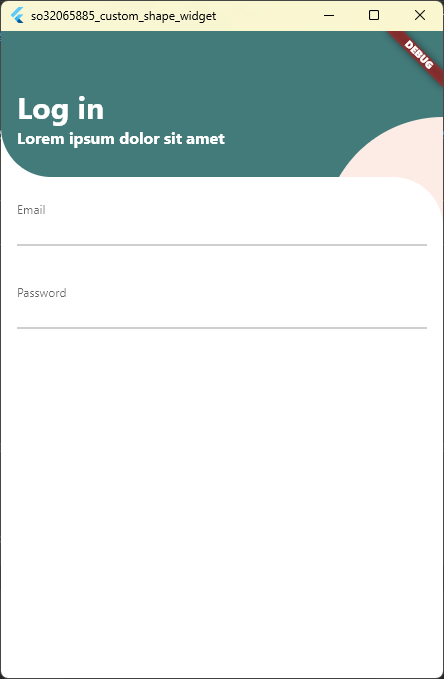
The CustomPaint widget will do the trick. With it, it's possible to paint custom shapes in the background like the one you asked for. It's just a matter of using the Stack widget to paint the background first and then the other widgets above it.
This is a prototype of the login screen:
import 'package:flutter/material.dart';
void main() {
  runApp(const MyApp());
}
const loginMainColor = Color.fromARGB(255, 67, 123, 122);
const loginOtherColor = Color.fromARGB(255, 253, 236, 229);
class MyApp extends StatelessWidget {
  const MyApp({Key? key}) : super(key: key);
  // This widget is the root of your application.
  @override
  Widget build(BuildContext context) {
    return MaterialApp(
      title: 'Custom Shape Widget Demo',
      theme: ThemeData(
        primarySwatch: Colors.blue,
      ),
      home: const LoginPage(),
    );
  }
}
class LoginPage extends StatelessWidget {
  const LoginPage({Key? key}) : super(key: key);
  @override
  Widget build(BuildContext context) {
    final width = MediaQuery.of(context).size.width;
    final height = MediaQuery.of(context).size.height;
    return Scaffold(
      appBar: AppBar(
        elevation: 0,
        backgroundColor: loginMainColor,
      ),
      backgroundColor: Colors.white,
      body: Stack(
        children: [
          Stack(
            children: [
              CustomPaint(
                size: Size(width, height),
                painter: const BackgroundPainter(90),
              ),
              Padding(
                padding: const EdgeInsets.only(left: 16, right: 16),
                child: Column(
                  mainAxisAlignment: MainAxisAlignment.start,
                  crossAxisAlignment: CrossAxisAlignment.start,
                  children: const [
                    Text(
                      'Log in',
                      style: TextStyle(
                          fontSize: 30,
                          fontWeight: FontWeight.bold,
                          color: Colors.white),
                    ),
                    Padding(
                      padding: EdgeInsets.only(bottom: 60 - 16),
                      child: Text(
                        'Lorem ipsum dolor sit amet',
                        style: TextStyle(
                            fontSize: 16,
                            fontWeight: FontWeight.bold,
                            color: Colors.white),
                      ),
                    ),
                    Padding(
                      padding: EdgeInsets.only(bottom: 30),
                      child: TextField(
                        decoration: InputDecoration(
                          label: Text('Email'),
                          floatingLabelBehavior: FloatingLabelBehavior.always,
                        ),
                      ),
                    ),
                    TextField(
                      decoration: InputDecoration(
                        label: Text('Password'),
                        floatingLabelBehavior: FloatingLabelBehavior.always,
                      ),
                    )
                  ],
                ),
              ),
            ],
          ),
        ],
      ),
    );
  }
}
class BackgroundPainter extends CustomPainter {
  final double titleBarHeight;
  const BackgroundPainter(this.titleBarHeight);
  @override
  void paint(Canvas canvas, Size size) {
    var paint = Paint()..color = loginMainColor;
    const smallRadius = 50.0;
    const bigRadius = 120.0;
    canvas.drawCircle(
        Offset(smallRadius, titleBarHeight - smallRadius), smallRadius, paint);
    canvas.drawRect(
      Rect.fromPoints(
        Offset(0, 0),
        Offset(size.width, titleBarHeight - smallRadius),
      ),
      paint,
    );
    canvas.drawRect(
      Rect.fromPoints(
        Offset(smallRadius, titleBarHeight - smallRadius),
        Offset(size.width, titleBarHeight),
      ),
      paint,
    );
    paint.color = loginOtherColor;
    canvas.drawCircle(
        Offset(size.width, titleBarHeight + 60), bigRadius, paint);
    paint.color = Colors.white;
    canvas.drawCircle(
        Offset(size.width - smallRadius, titleBarHeight + smallRadius),
        smallRadius,
        paint);
    canvas.drawRect(
        Rect.fromPoints(
          Offset(size.width - bigRadius, titleBarHeight),
          Offset(size.width - smallRadius, titleBarHeight + 60 + bigRadius),
        ),
        paint);
    canvas.drawRect(
        Rect.fromPoints(
          Offset(size.width - smallRadius, titleBarHeight + smallRadius),
          Offset(size.width, titleBarHeight + 60 + bigRadius),
        ),
        paint);
  }
  @override
  bool shouldRepaint(CustomPainter oldDelegate) {
    return false;
  }
}
Solution 2
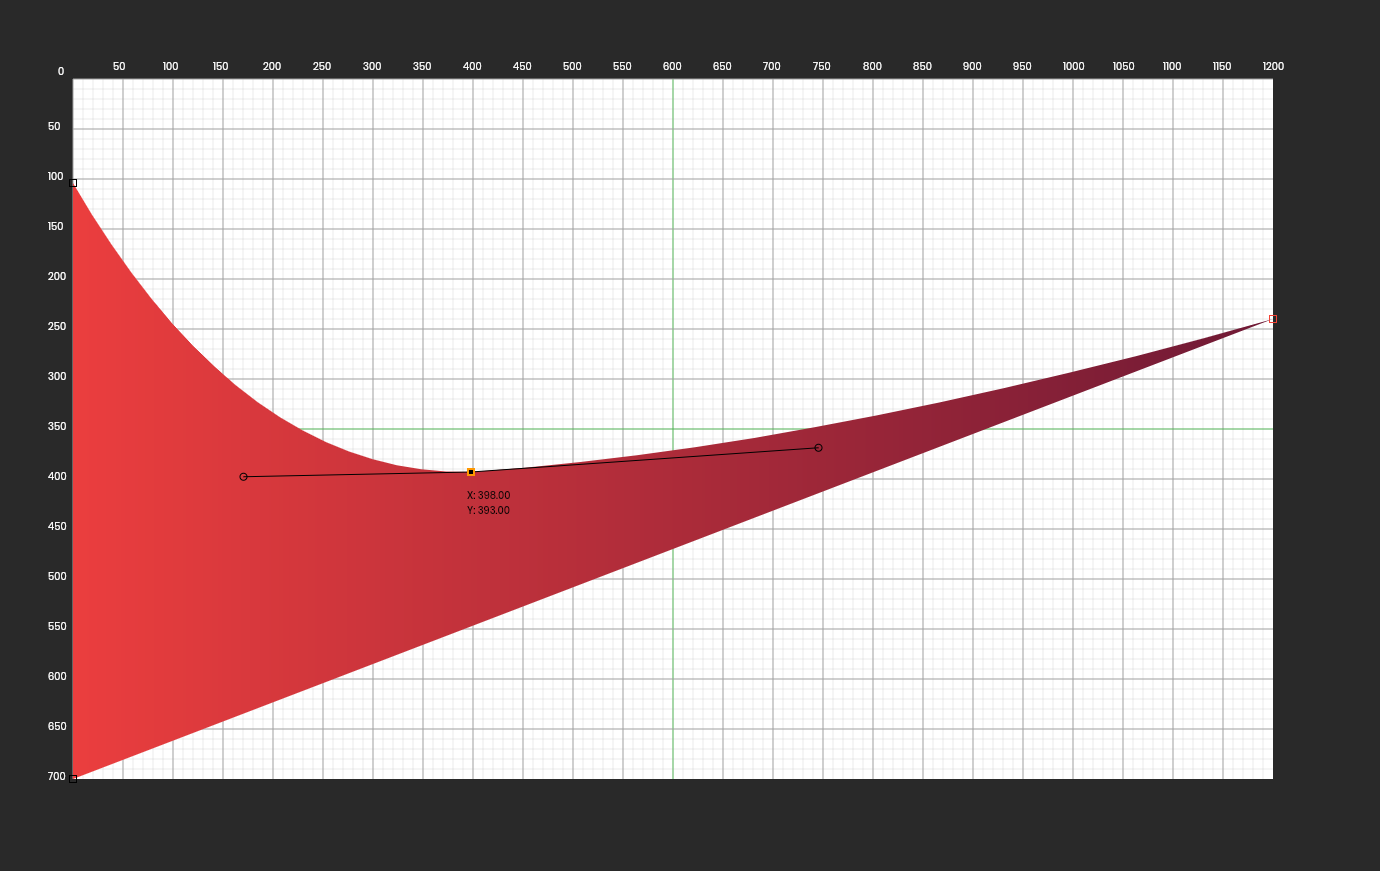
As lepsch commented, CustomPaint is the way to go, but it you find it complicated or time-consuming, you can also get some help from tools such as FlutterShapeMaker (FlutterShapeMaker), which allows you to draw your shapes as if you were in some design software and export them into a CustomPainter class
First you edit your shape as you like
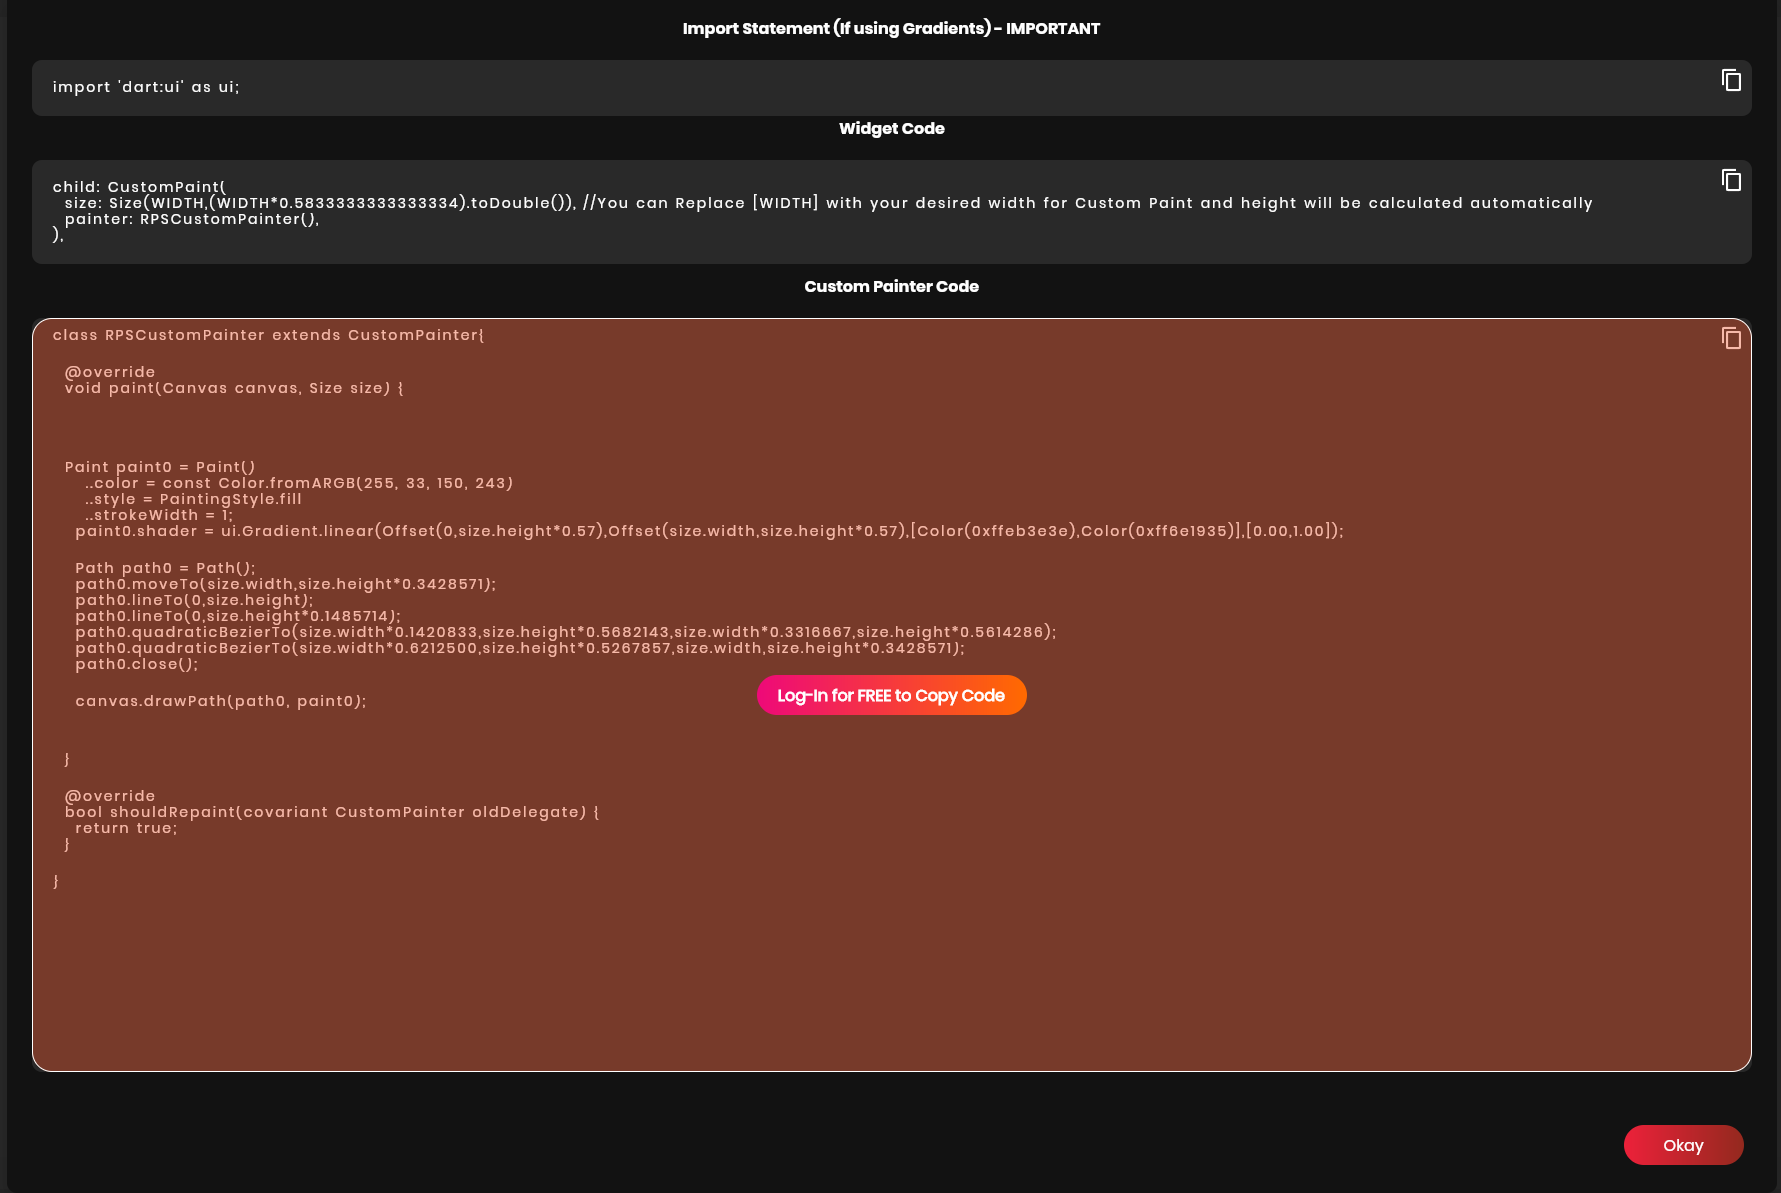
Then you export it and the tool generates the required class and imports
Mateusz Ptak
Updated on January 05, 2023Comments
-
 Mateusz Ptak 10 months
How Can I create this curves and two coloured top "appBar" using Flutter?
-
 Harish Sharma over 1 yearYou need to use custom paint to draw such types of curves. For more details read about custom paint api.flutter.dev/flutter/widgets/CustomPaint-class.html
 -
Mateusz Ptak over 1 yearThanks Fabian! You've really helped me!