System BIOS doesn't show Ubuntu as boot option after installation?
Just a question before I start, you have 2 drives? 256GB with Windows and 16GB mSATA? What do you use the mSATA for if not Ubuntu?
To my knowledge PenDriveLinux.com creates MBR-style bootable media, with uncertain support for UEFI. If you want your machine to use UEFI, which is really recommended, you should disable CSM and create only UEFI bootable media just to be sure that you don't accidentally boot and install in MBR mode while installing to a GPT partitioned drive and probably making things more messy.
You seem to have installed in MBR mode, otherwise the installer would have recognized a UEFI machine and be able to register an EFI boot loader in the firmware bootmenu that it placed on the EFI System Partition (ESP). If you can't find an Ubuntu related .efi binary on your ESP, then you probably installed in MBR mode (or GPT MBR mode) and you should be able to boot from the drive in leagcy/MBR mode, you just need to figure out how. (Typically Thinkpads offer priority booting, e.g. booting legacy first.)
Gummiboot as default hotpluggable UEFI bootloader
Given that you already have a GPT partitioned target disk (all with preinstalled Windows 8 should be), you could try troubleshooting your existing MBR installation by trying the following instructions.
Note: Please be aware that these instructions are not a permanent fix or proper setup. They are just a static configuration to get you into your installation and proceed with troubleshooting from there (e.g. installing GRUB properly).
-
Get gummiboot
Download gummiboot from the Arch Linux repositories. (Everything is fine, we are just doing Linus Torvalds style package management. You can find the download link on that page far on the right under Package Actions > Download From Mirror)
Extract
gummibootx64.efifrom the package (it's under/usr/lib/gummiboot/) and copy it as\EFI\BOOT\BOOTx64.EFIto your ESP. Backup existing files with the same name (e.g. use zip). -
Copy kernel files
Create a new folder at the root of your ESP named
Ubuntuand copy all the files with the highest version number from/boot/to the folder you just created.If you are on Windows, download the latest package matching
linux-image-$VERSION-genericfor your distribution from the repositories. (initrd.img-$VERSION-genericis missing as it is generated automatically by Debian scripts.) -
Configure gummiboot to boot the Ubuntu Linux kernel
Create folders along the path
loader/entries/at the root of your ESP and create a file namedubuntu.confin there. Create a configuration by editing the file following this template:title Ubuntu linux /Ubuntu/vmlinuz-$VERSION-generic initrd /Ubuntu/initrd.img-$VERSION-generic options root=UUID=$UUID rotitle: Choose what you like. Must be human readable.
linux: The filename of the kernel to load, replace
$VERSIONwith the version number of the file you copied.initrd: The filename of the initial ram disk. Basically the same as with the linux option,
$VERSIONwith the version number of the file you copied. Leave this line out if you don't have such a file (I don't know if it will work then though).-
options: Replace
$UUIDwith the filesystem UUID of your Ubuntu root filesystem. Runll /dev/disk/by-uuid/ | grep sdxYto get the GUID, replacesdxYwith the actual device name. (Forget what I wrote here earlier about partition GUIDs, that doesn't seem to work for now.)You can add the remaining options of the
linuxline from your/boot/grub/grub.cfg. The UUID is necessary part, the rest should be rather optional. Mylinuxline ingrub.cfglooks like this:root=UUID=00000000-0000-0000-0000-000000000000 ro quiet splash $vt_handoff
You also need to add the file
loader.confinloader/to make gummiboot work.default Ubuntu timeout 4default is the title of the default entry to boot. Edit appropriately if you have chosen another title.
-
Reboot
You should be able to boot from the HDD/SSD that contains the ESP with gummiboot and be presented with the gummiboot menu, allowing you to boot your Ubuntu installation.
-
Optional: Create a gummiboot menuentry for GRUB
Similar to the instructions above, create
loader/entries/ubuntu.confwith the following content:title Ubuntu GRUB efi \EFI\ubuntu\grubx64.efiAlternative:
title          Ubuntu GRUB
efi            \EFI\ubuntu\shimx64.efi
I'm still researching this topic and I wanted to test this throughly before writing it down here in a clean and non-quirky way, but may be these instructions give you helpful directions and are more fun to you than trying to install again and again.
Good luck.
Further reading
- AdamW's UEFI boot: how does that actually work, then? is a good but lengthy read on treating the UEFI boot topic not like magic.
- https://wiki.archlinux.org/index.php/Gummiboot
- https://wiki.archlinux.org/index.php/EFISTUB
FYE
Stuff I suffered from during testing:
- PARTUUID/GUID - doesn't seem to work.
- initramfs compiled with
depoption instead ofmost. - initramfs of cloned installation finds a hibernation image from the source installation and boots that instead. m(
- Windows avoids mounting ESPs.
Related videos on Youtube
 10 : 03
![How to Fix grub not loading Ubuntu [Boots into Windows Directly]](https://i.ytimg.com/vi/hAKcxYdkal4/hq720.jpg?sqp=-oaymwEcCNAFEJQDSFXyq4qpAw4IARUAAIhCGAFwAcABBg==&rs=AOn4CLA1v77E_iIDEPF1ndZs8visZRLGrA) 06 : 26
06 : 26
 04 : 31
 08 : 11
 01 : 50
AlexMTMorgan
Updated on September 18, 2022Comments
-
 AlexMTMorgan over 1 year
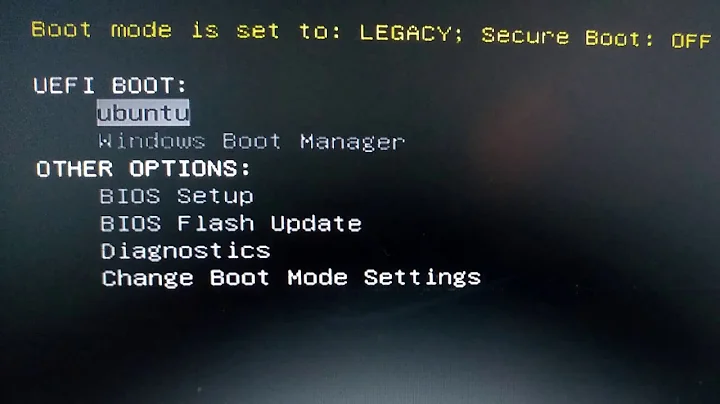
After trying and failing many times to create a bootable USB, I finally managed to create one using Universal USB Installer from PenDriveLinux.com. I created a bootable USB with Ubuntu 13.10 64-bit flavour and managed to successfully boot to the USB after disabling Secure Boot, enabling UEFI & Legacy boot and manually selecting my USB drive.
After successfully installing Ubuntu on a new partition on my SSD, I removed my USB stick, restarted my computer and spammed the Enter key in order to get into my BIOS. I went to manually select where to boot from, but there was no new option for Ubuntu.
Because I'm a computer science student, I think of myself as being fairly clever and so I simply selected my SSD, but it ran through a different boot sequence (neither what my computer used to boot through nor my new shiny Ubuntu OS). What I think is happening is that my computer normally quick boots Windows 8.1 through my 16GB mSATA, but it booted Windows 8.1 through my SSD when I selected it, rather than Ubuntu.
So what I'm asking is, how do I get it to boot Ubuntu rather than Windows 8.1 from my SSD when both are located on the SSD and there is no option for anything else? Is there a way to modify the BIOS so that it gives me the option to boot from one partition on my SSD rather than another? I have as of yet been unable to boot into Ubuntu, I've only managed to boot to Windows 8.1 two different ways.
I've included tech specs below, but if you need any more information I'll make sure to follow up.
Machine: ThinkPad S1 Yoga
Tech Specs:
- Intel Core i7-4500U Processor (4MB Cache, up to 3.00GHz)
- Windows 8.1 64
- 8GB PC3-12800 DDR3L on MB
- Intel HD Graphics 4400
- 256GB Solid State Drive SATA 6G
- 16GB mSATA
-
 Wes about 10 yearsIf you installed Ubuntu after windows, wouldn't grub become the bootloader? You should be selecting the OS to boot through the bootloader; not the UEFI/BIOS
-
AlexMTMorgan about 10 yearsI'm not 100% sure, but I was under the impression that the mSATA was preconfigured to quick boot Windows 8.1. I have no idea how to modify the contents of the mSATA anyway as I don't think it shows up in disk management when using Windows 8.1
-
AlexMTMorgan about 10 yearsI'm able to boot from the SSD. I know this because when I boot in UEFI mode vs manually selecting the SSD, it has a different loading screen (displaying Lenovo's logo when in UEFI, vs. displaying low resolution odd-looking Windows 8 logo when booting from SSD).